Why threadless stems? And five ways to raise your bars
Biking Skills
September 18th 2019
In the past twenty years, the way handlebars are attached has changed completely, affecting how you customize your bike to fit your needs. We’ve gone from “quill stems” to “threadless stems.” Here’s why that change to threadless stems was so popular and how it helps you customize your bike fit to your needs.
Didn’t the old way work great? Why change?
Raising your handlebars used to be so easy decades ago back when we had what were called quill stems. You just loosened the big nut on top of your stem, lifted up your bars, and tightened the stem nut again. Easy peasy…if you happened to be carrying a big wrench with you, which never happened.

One big bolt (C) held your stem in place, often securely, by pulling the wedge nut (D) against the threaded fork inside wall (B).

You could also swap out the quill stem for a longer one…if you felt like unwrapping and threading your entire handlebar set through that single-bolt clamp at the top.
And finally, there was the weight issue. This whole design depended upon a long stem fitting inside a steel fork with a threaded top, and two big nuts at the top that turned against each other (each with its own wrench, since you’re turning both at the same time). Now you’re carrying two wrenches.

Standard fork diameter? Nope. That was a pain too.
Put it all together, and you have a maintenance-intensive, complex way to attach your handlebars to your bike. But it had always been done that way, and every company followed the same approach, so who’s going to change an entire market?
Threadless stems, thanks to a biker and an office chair.
John Rader was a mountain biker with a machine shop and an annoyance. Mountain bikes were too heavy, and the tools to keep bars and fork secure in rough riding made the problem worse.

Who wants to haul these up a mountain?
Somebody had to do something revolutionary, so he rethought everything about the fork and stem relationship. Those heavy and temperamental fork nuts were going away, so there was no need for the fork to be threaded anymore (or even steel). The steerer tube of the fork would keep going up past the frame, and a shorter stem would clamp to the outside of that.
There wasn’t a good way yet to raise the bars, but high bars weren’t as important for mountain bikers. And he hadn’t yet perfected how to provide the downward force needed to pull up on the fork and hold the fork on super-securely, but that was a detail for later. First, he needed to take his idea to a component manufacturer.
At the 1990 UCI World Championship, John got 30 seconds with a very busy sales manager at Dia-Compe–just enough time to demonstrate how to remove and replace a fork with just a hex wrench. That wasn’t much time, but the capability without big wrenches was eye-opening.
John had done the impossible, and got a call-back for a more comprehensive demo in an office…where the lack of downward compression soon became an issue. During the demo, his fork fell off and one part rolled under an office chair–a rolling chair that connected to its wheelset using a star nut.
This was the missing piece of the puzzle! A star nut inserted inside a bike fork provides something to pull up against, compressing the entire assembly together for a snug, reliable fit. And with that, the threadless stem was born.

A star nut makes it possible to tighten a fork with just a small hex wrench.
Five ways to adjust your bar height with a threadless stem.
Once you understand the threadless stem concept, and the importance of that bolt on top, you can make all sorts of changes to make your bars the height you want. Here are five strategies.
1. MOVE YOUR SPACERS.

This threadless stem has been lowered just a little by moving two spacers above it. Note that handlebars now attach with a conveniently removable faceplate. No more threading a drop bar!
Spacers are rings in the area of the stem, usually made of aluminum or carbon. As long as your top cap can compress the assembly, you can move the rings above or below your stem–above to lower your stem, below to raise it.
2. FLIP YOUR STEM.

The pros call flipping your stem “slamming it”.
This is often done with stems that have a mild rise to them, such as 5 or 6 degrees. Serious racers will sometimes invert their stems for lower bars and a more aerodynamic ride. Or maybe because other racers are doing it.
3. REPLACE YOUR STEM.
If you decide to get a different stem, you’ll find there are a range of options available.
A short stem. A short stem doesn’t raise your bars, but by shortening the distance between hips and hands, it raises your upper body. (You can also do that by moving your seat forward).

Short stems are popular with downhill racers.
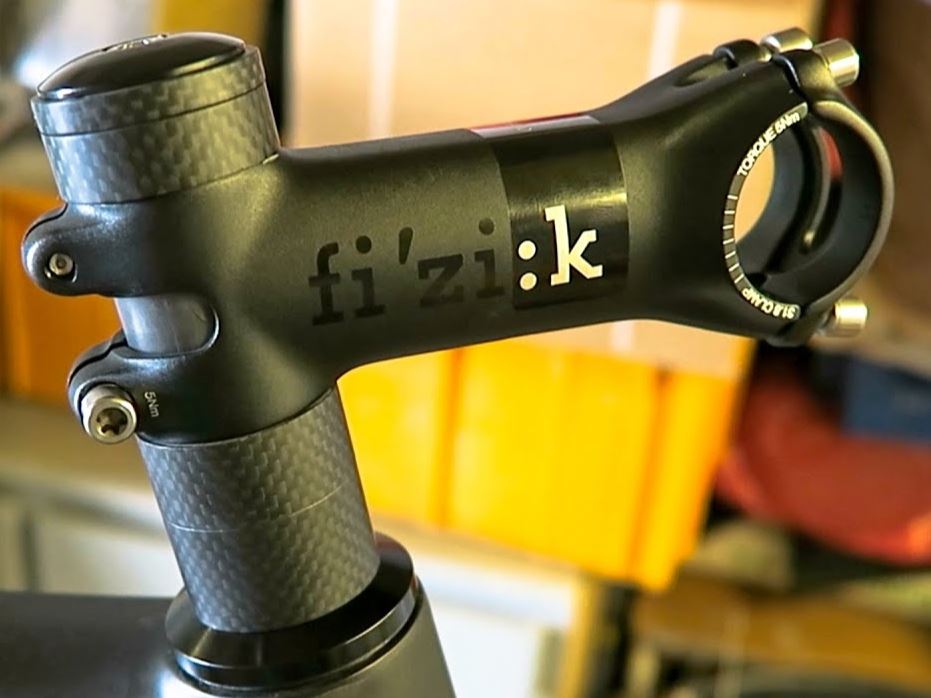
An angled stem. Angled stems keep the steerer tube clamping point in the same place, but raise the handlebar clamp.

Angled stems are widely available and provide a couple of inches of lift.
An adjustable-height stem. This is like an angled stem that you can experiment with to get your perfect combination of height and reach.

Great for experimenting and all-around casual riding, but not the best stem if you’re jumping your bike.
A THINstem. This threadless stem provides only about one inch of lift. Primarily, it does something else, allowing your bike to fold flat to fit against walls, so you can store a bike conveniently in a hallway or crowded garage.

A THINstem flattens your bike.
4. REPLACE YOUR HANDLEBARS WITH RISER BARS.

A riser bar gets you an inch or more of height or reduced reach.
Riser bars can add two inches or more to your bar height, or bring your bars more toward your hips for a more upright ride.
5. ADD A STEM EXTENDER.

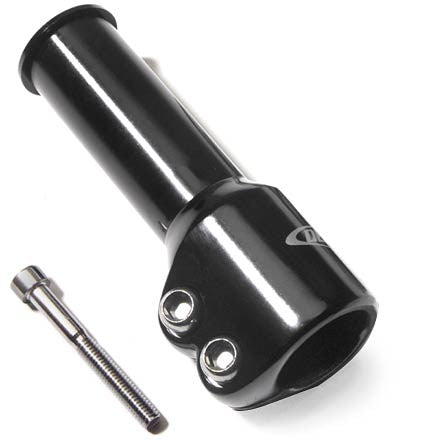
A stem extender fits on the top of your fork’s steerer tube. Note the compression bolt.
A stem extender can raise your bars five or six inches to a completely different type of ride–more upright, and less opportunity for the upper body to help with steep climbs and fast descents. A bike with this handlebar arrangement is most similar to the “Dutch style” of riding (where there are fewer hills) or the high bar/low frame combination found on folding bikes with smaller wheels.
Adding a stem extender is conceptually easy–just extend the steerer tube of the fork higher with this attachment. But in practice, it typically requires swapping out the shifter and brake cables and housing with longer replacements. If you choose this approach, we suggest having a bike shop or a veteran rider do it.
Ready to customize a bike?
So now you know at least five ways to make your bike fit you better. And these techniques work with any threadless-stem bike.

But mixing and matching doesn’t always work. Slamming a long, high-angle stem? Bad idea!!!
One question we often get is . . . can you make these modifications to the folding, full-size CHANGE bikes you sell?
We can and do. It’s a couple of extra steps, and we might ask you to have a recommended part sent to us, but all the options except stem extender can be done for free on any bike that leaves our shop. (We install stem extenders too, but it requires additional supplies and shop time.)
Just as importantly, most of these updates are tweaks that you can easily make at home at any time. To see a stem swap-out in action, just look at this video.
Enjoy making your bike yours!
Bob Forgrave is president of Flatbike, an
ecommerce company offering full-size folding bikes
and kits to make any bike take up half the space.
For more details on the origin of the threadless stem, see cyclingtips.com
34 responses to “Why threadless stems? And five ways to raise your bars”
Great story! I always wondered who invented the threadless stem system. Not Campagnolo or Shimano, but mountain biker John Rader.
I hope he was well – compensated for such a brilliant creation.
Good old Yankee ingenuity.
I was curious, going from a 100mm stem with a flat 600mm bar to the same stem but with a 750mm bar with 19mm rise…if I was supposed to go with a shorter stem also?
I didn’t want to change my reach much just rather the height of my bars.
How can this affect my steering when trail riding? I see many running shorter stem long bars but dont hear much about long stem long bars
Thanks
D
Great question. Your new bars are 150mm longer, so you’ll have to reach more to grab them at the grips. If you don’t want to do that, how much shorter is the ideal stem?
Well, one thing is certain. You’re reaching an extra 75mm with each arm. Your arms aren’t getting longer, so that distance has to come from reach. Reaching includes bending over, but now you’re doing 19mm less of that. To me, that leaves about 55mm of reach unaccounted for. Particularly if you are concerned about reach, I’d recommend a replacement stem also, in the 40-50mm range. These are fairly standard for downhill bikes.
Your second question is about how longer bars affect trail riding. It’s a complex answer. If you’ve got big (29″) wheels, longer bars can give you more leverage on rough trails. Same with downhill, when you need fast strength. Riding a technical trail through the woods? Those long bars are more at risk of hitting a tree. And of course, the more you lean forward, the more you need to be aware of that; there are times when it’s great and times when it’s a tumble risk. You’re already managing that risk by asking these questions, so kudos to you.
Great article !!
Have to say I found 80s/90s MTB quill stems had benefits:
1.Easy to micro adjust height on the trail (1x6mm Allen key. Not a 4 and 5mm as on most threadless set-ups) without affecting headset set-up.
2. Could turn the bars round 90 Deg so the bikes were easier to store without affecting headset set-up.
However the pros out-do these!
Howie, I’m going to have to agree with you on both points. Micro-adjustments on the trail are nice (and sand to lose), and the 90-degree handlebar swivel for storage was nice. For now, both of these functions are accomplished via specialized stems—different ones, unfortunately.
Micro-adjustments can be handled with an “adjustable stem”, such as those made by Zoom or WAKE. We sometimes add these by request to the folding full-size bikes we sell. Adjust on the trail with just a 6mm Allen key.
Folding 90 degrees is handled easily without tools using a THINstem (https://flatbike.com/product/thinstem). Some of our bikes even include that valuable feature by default.
Thanks for your observations!
Bob
Bob
I needed to raise the bars on a new bike but didn’t want a bolt on steerer tube extender. They look hoakey to me. Same for the Zoom adjustable stem…
Looked at Surley and other brands of forks with a long, uncut steerer tube, but no love. Finally found the solution. It’s an adaptor that inserts into the existing tube secured with a reversed star nut. It’s totally secure and I’ve been running it for a year now. Really elegant solution for picky people like me. The dood that makes them is a master of making all kinds of really trick adaptors for bikes. His Instagram is @blueliquidlabs.
Interesting, Terry. I looked at this engineer’s page, but didn’t see it. This sounds like a quill stem riser or quill stem extender, available on Amazon or eBay. Is that similar?
Funny, I built one in 82 with my cook brothers uniclamp after I had someone machine the threads out of the bearing adjuster. I just used a long bolt and washers to tighten it. It had play though. The real breakthrough is the wedge that removes the play.
Impressive! Interesting how youth biking used to be a lot of a “home-built” experimentation. I rebuilt my 10-speed Schwinn varsity to handle the jump across a creek on the way to work. One essential component: a stronger stem from a 1-speed…
Moving a quill stem doesn’t need a heavy wrench (or two). The quill bolt has a hex head, so you only need a hex wrench (which is light). If you need to service the headset, yes you need two wrenches, usually a specialized headset spanner which is thin and a standard wrench. How often do you need to do that though?
Also, you can get quill stems with removable face plates so you can avoid having to strip the bars to replace the stem.
Agreed, Howie. Before going out of fashion, quill stems advanced to hex-wrench capable (easier to tighten than a hex-head bolt), and removable face plates were a huge time-saver.
I think the main advantage was to manufacturers who no longer needed to stock a range of threaded fork steerer tubes, while also making possible carbon forks, which are incompatible with quill stems.
There is still a huge demand out there for on-demand height adjustability at the level of what quill stems offered.
The author doesn’t understand how threaded forks work. To adjust a quill stem all you needed was a single 6mm Allen key. The nuts that thread into the top of the fork tension the headset bearings and never need adjusting except when it comes time to replace or repack your bearings. They had nothing to do with handlebar adjustment.
The threaded headset and stem was simple, reliable, and easy to adjust. That’s not to say that the threadless system doesn’t have advantages. Threadless is slightly lighter. But of all the sources of maintenance headaches on old time bikes, none of them were the stem or headset.
Good point about the 6mm allen key. Adjustment today may require two sizes of key–4mm for the side of the stem and a larger one of variable size for the cap–so the “easy to adjust” part was more true in the past, with regards to the stem. “Simple” also applied, as long as you’re not talking about shipping the bike, which often required removing the fork. Then you’re into the big wrenches.
Reliable? Not so much. To keep a quill stem from turning, you needed to cinch it very tightly, because it was held with only one screw. For trail use with high vibration, even tighter. Enough of that, and it’s easy to bulge out the steerer, ruining your fork. Here’s info on freeing stuck quill stems, especially once aluminum forks came along and internal corrosion happened: https://www.sheldonbrown.com/brandt/stuck-stem.html.
Perhaps some things should stay in the office chairs…
Threaded stem is perfect, all you need to adjust height is an 6mm allen wrench, and no you don’t have to unwrap anything, there were plenty of stems with hinges that opened or with removable plates which were allowing for easy replacement with the same size wrench btw. Now with MuCh ImProVed threadless stems, if someone cuts the fork tube then you need entire new fork or new stem with different angle, I guess it’s a great for business but not so much for users.
Thanks, V8! Another vote in favor of the (now lost) flexibility of the quill stem design. It looks like there’s a huge market for a fork system that merges that flexibility with the three-bolt reliability of the threadless stem. As we look at addressing this need, I’m particularly interested to hear from others who miss the “quill-stem days” and would welcome an alternative approach that provides the height-adjustment benefits of quill, yet works with carbon fork steerer tubes.
What are the best stems to buy for my mountain bike
Good question, David. What are you trying to do? Like with footwear selection, your usage goal determines your product choice.
– If you just want to raise your bars a bit, an angle stem is a good choice.
– If you want to pull yourself back from a lean-forward ride, then an MTB downhill stem is a good choice.
– If you want to raise your bars a bit but also have the ability to save space by “flattening” your bike–turning the bars 90 degrees while the wheel remains forward, then we suggest a THINstem.
Honestly, a stem is simple enough that all stems are much the same. The two things to know are: 1. Whether you currently have a quill stem or threadless stem, and 2. the diameter of your handlebars (older bars are 1″ straight across, and newer ones gradually bulk up in the middle to 1.25″). Then you’re all set!
The low height of the handlebars on my new women’s mountain bike forces too much pressure on my upper back, shoulders, neck, and wrists. I would like to purchase a handlebar riser but the brake and gear cords are so short and tight around the bars that I am concerned if I try to raise the handlebar the cords won’t reach. How can I stretch or adjust or lengthen the cords DIY style?
Sian, you’ve identified the toughest part of a significant bar raise is that you are limited by the length of all four cables and housings. That’s quite a swap-out, but we’ve done it for customers, and it can be a DIY activity. But first, an important question: Do you need to raise the bars to give your upper back a break?
To save back muscles, drop-bar road bike riders have multiple hand positions to choose from when riding. Mountain bike riders don’t have the luxury–unless you decide to add it. Bar ends clamp onto the outer ends of your handlebars, offer another hand/arm/shoulder position that can be higher if desired, and don’t require any cable swapouts. This is where you might ride when you’re relaxed and don’t need to brake….like casual driving vs. hands firmly on the wheel at 10 and 2.
But if you choose to raise the bars more than 2 inches, here’s what you’ll need to do with cables:
1. Figure out exactly how much higher your bars will be. In most cases this is the height of the riser from its base to the point where the threadless stem will mount.
2. Take phone photos of how all four of your cables route. Even if you don’t need these, the act of studying the situation before taking action as a good habit.
3. Cut all four cables as far back as possible before the final nut and leave them in place.
4. Pull the cable housing out from the back, leaving the cable in place. **This is particularly important for internal cables**.
5. Get some new cable housing that’s as long as your existing housing + the distance from #1 (Brake and shifter housing are different). The best way to do this may just be to have your local bike shop cut you some from a roll. Get an extra-long shifter and brake cable (one each) while you’re at it.
6. From the back, slip the appropriate housing lengths–you’ll have four–over the related cables until close to your bars.
7. With the housing mostly in place, now you can swap out your cables. Your old short cables (front shifter, brake)are trash. Your old long cables (rear shifter, brake) are your new short cables. And your new cables are for the rear.
8. Mount your new riser, connect all the cables, and tune your brakes and shifting. Did it yourself!
Hello Bob.
I’m a bit of a retrogouch when it comes to bottom brackets and hub spacing but one big advantage of Aheadset design is that wall thickness of the fork can be made to any thickness and of any material as long as the outside dimensions match the available bearings. I had a tandem that of course needed a stronger than normal fork so that meant a thicker non standard steering tube on the fork. All was great until the head bearings had to be replaced and it became evedent where the space for the additional wall thickness came from. The inside races upper and lower had to be machined out so that an industry standard quill could fit inside.
I’m sure we wouldn’t have had as many reliable carbon or suspension forks over the years without this simple development because without the contraints of a quill having to fit inside, the walls could be made to any thickness.
The Flatbar looks like it will be a very interesting “must have” to RVers and Van Lifers.
Regards,
– Doug
Ah… the joys of non-standard componentry, just when you need a quick fix. Yes, the threadless stem definitely had an impact on the development of thicker and more reliable steerer tubes that still adhered to a standard. Thanks for sharing that perspective, Doug.
And yes, the THINstem is highly popular right now with RV owners!
Where can I get an adjustable stem for a Rambo bike?
Like most electric bikes, Rambo bikes have a lot going on at the stem, with the readout mounted there. We can’t see the type of mounting, but this is typically one of the more standard parts of the bike, with a 1.25″ bar. Any vertically adjustable stem on Amazon for a 1.25″ bar should work.
Wow, this is a great summary of my options — thank you!! I have a fitness bike and I hope to shorten my reach a bit and sit a bit more upright (think one notch closer and one notch higher). No spacers available. Do you suggest that I start with a stem swap?
This is not an uncommon need. A variable-height stem can make your ride a lot more comfortable. Just remember to get one that matches your handlebar diameter at the clamping point. Older or steel bars then to go straight across (1″ or 25.4mm), while newer bars tend to bulge in the center to 1.25″ (31.8mm)
I just want to say great article – I blinked and stems changed and I wasn’t sure what had happened – and very generous advice in your replies. Cheers.
Thanks for the nice comment, Mick!
Thanks for the useful information. Do you have any ideas to raise the handlebars on children’s bicycles?
Great question, Dalton. The same principles as with an adult bike apply to kids’ bikes. All that changes, since kids’ bikes are often lower quality, is the solution-to-bike price ratio; how much are you willing to put into something you didn’t invest much in at the beginning?
Why are you raising the bars? If the child has outgrown the bike or it was never the right size to begin with, you might get more value with a larger replacement bike. Maybe even get a used one for cheap on Craigslist or eBay and turn its tune-up into a “learning together project”.
If the frame is the right standover height but your child prefers to ride in an upright position AND this bike has a threadless stem, then I’d recommend either the adjustable threadless stem as a replacement or the stem adapter as an add-on below your current stem.
I have successfully applied to my daughter’s bike with very simple steps: First, remove the hub bolt or nut a few turns. In the next step, you need to pull the handlebars of the bike up meticulously until your child has the desired height to use. Align the handlebars to ensure proper orientation, especially since the bike pedal may have gone sideways during the first process. The next thing that you should align the handlebars with is the saddle. Note that the handlebars can be above, level with, or just below the saddle. If the saddle is already in place, make sure the handlebars are slightly below or equal to the height of the saddle. And finally, squeeze the steering wheel and get the job done.
Thanks for asking Dalton, i was also having difficulty raising the handle bars for my 6 year old girl. Thank you so much Bob for the detailed guide and specific answer.
I have a 54cm road bike and want to reduce the reach (probably legs longer than most of my height and therefore a shorter body). I went from 100mm to 80mm bodywork – this road bike stem is sourced from Origin8, it helps distribute weight evenly and makes riding more comfortable. Installing this bike stem wasn’t an issue, either, with its two-piece faceplate design. I can’t even imagine a newbie biker having trouble with it.
HI, myself riding a 22 Inch handlebar bike, looking for another alternative handle to lift it, and landed here. Thanks for this kind of information and its means a lot to me. A true rider will always passionate about riding comfort.